What you need
A pencil, an eraser and a sheet of paper are enough. Draw lightly at first, then trace the lines you want to keep when your maine coon cat is finished.
Step 1 of 6
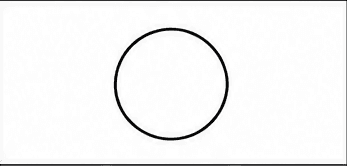
Draw a circle for the Maine Coon's head
Begin your Maine Coon cat drawing with a large, neat circle. This simple shape sets the size and position of the cat's head.
Beginner tip: Use a light pencil line so you can tidy the outline as the furry details are added.
Your drawing after step 1 Step 2 of 6
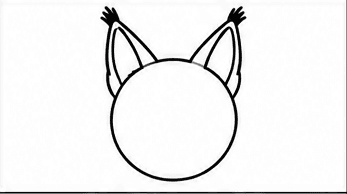
Add tall ears with tufts
Draw two large pointed ears on top of the circle. Add an inner line to each ear and a few short strokes at the tips for the Maine Coon's distinctive tufts.
Your drawing after step 2 Step 3 of 6
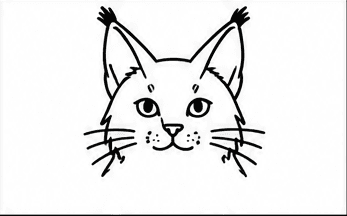
Draw the eyes, nose and whiskers
Add two oval eyes, a small triangular nose and a curved mouth. Finish the face with whiskers, tiny muzzle dots and a few angular cheek tufts.
Beginner tip: Keep the eyes level and place the nose midway between them for a friendly expression.
Your drawing after step 3 Step 4 of 6
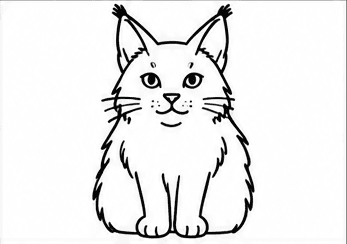
Build the large fluffy body
Draw a broad sitting body beneath the head with jagged curves along the shoulders and sides. Add two straight front legs and small rounded paws.
Your drawing after step 4 Step 5 of 6
Add the back legs and bushy tail
Curve a rounded back leg out on each side of the front paws. Then draw a long, full tail sweeping upward beside the cat.
Beginner tip: Use an uneven, feathery outline to make the tail look thick and soft.
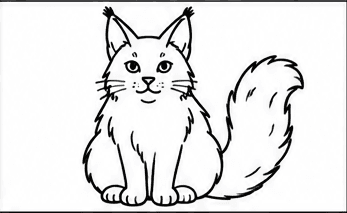
Your drawing after step 5 Step 6 of 6
Finish the Maine Coon's long coat
Add short tapered fur lines across the chest, body, legs and tail. Keep the marks spaced apart so the finished Maine Coon stays clear and easy to color.
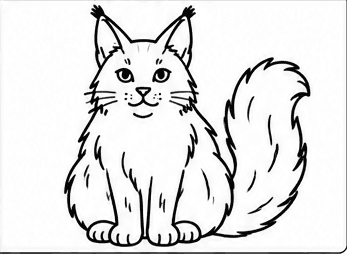
Your drawing after step 6
That's it! You have drawn a maine coon cat.
Trace your favorite lines a little darker, erase any unwanted pencil marks and add color if you would like.